LinkedIn Sales Navigator Tutorial for Beginners: Step-by-Step Guide to Targeting & Automation
LinkedIn Sales Navigator helps beginners find qualified leads through advanced filtering by job title, company size, geography, and industry.
However, your success depends on three critical steps: optimizing your LinkedIn profile first, mastering Lead Filters to build targeted lists, and using automation tools to scale outreach consistently.
If you are beginner in LinkedIn Sales Navigator this video is for you:
TL;DR: Quick Summary
- Profile optimization comes first: Sales Navigator fails if your LinkedIn profile doesn't convert visitors into connections
- Get 2 months free: Use the referral method from existing Sales Navigator users to access the platform at no cost initially
- Focus on Lead Filters: Target people directly using 4 key filters (company size, job title, geography, industry)
- Sales Navigator finds leads, automation contacts them: The platform doesn't send messages automatically; you need tools like Bearconnect
- Expected results: Properly configured searches generate 500-1,000+ qualified prospects per campaign
Why Most Sales Navigator Users Fail (And How to Avoid It)
The Profile Problem Nobody Talks About
Many beginners buy Sales Navigator, send connection requests, and wonder why nobody responds. The problem isn't the tool.
Your LinkedIn profile is your landing page.
When prospects receive your connection request, they check your profile within seconds. If it looks incomplete, generic, or unprofessional, they reject the request.
Before spending money on Sales Navigator:
- Update your headline to clearly state who you help and how
- Add a professional banner image that reinforces your value proposition
- Write an "About" section that speaks directly to your ideal client's pain points
- Include social proof like case studies, testimonials, or portfolio work
- Feature your best content in the "Featured" section
This foundation is non-negotiable. A great tool can't fix a weak profile.
How to Get Sales Navigator Free for 2 Months

The Referral Loophole Strategy
Sales Navigator typically costs around $80-$130 per month. But there's a legitimate way to access it free for 60 days.
If you know someone with an active Sales Navigator account, they can refer you.
For the Person Sending the Referral:
Step 1: Log into their Sales Navigator account
Step 2: Click on their profile icon in the top right corner
Step 3: Select "Referrals" from the dropdown menu
Step 4: Choose one of two options:
- Generate a referral link to share via message
- Search for your name directly within Sales Navigator and send the invitation
For You (The New User):
- Step 1: Watch for a message on LinkedIn or WhatsApp containing the referral link
- Step 2: Click the link within 30 days (links expire after this period)
- Step 3: You'll see an offer page showing "$0 for the first 2 months"
- Step 4: Click "Redeem Offer" and enter your credit card details to activate
Important note: While the first two months are free, you must provide payment information.
After the trial ends, standard pricing applies (approximately €120/month or $130/month).
Don't have a connection with Sales Navigator?
Join LinkedIn groups for sales professionals, reach out to agency owners, or ask in B2B communities. Many users are happy to send referrals.
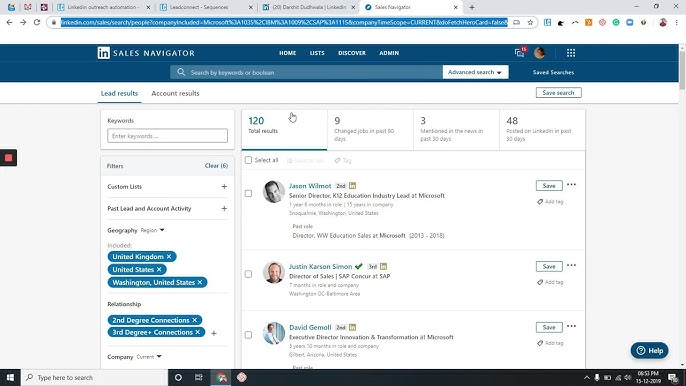
Mastering Sales Navigator Filters: The 4-Filter Framework
Understanding Lead Filters vs Account Filters
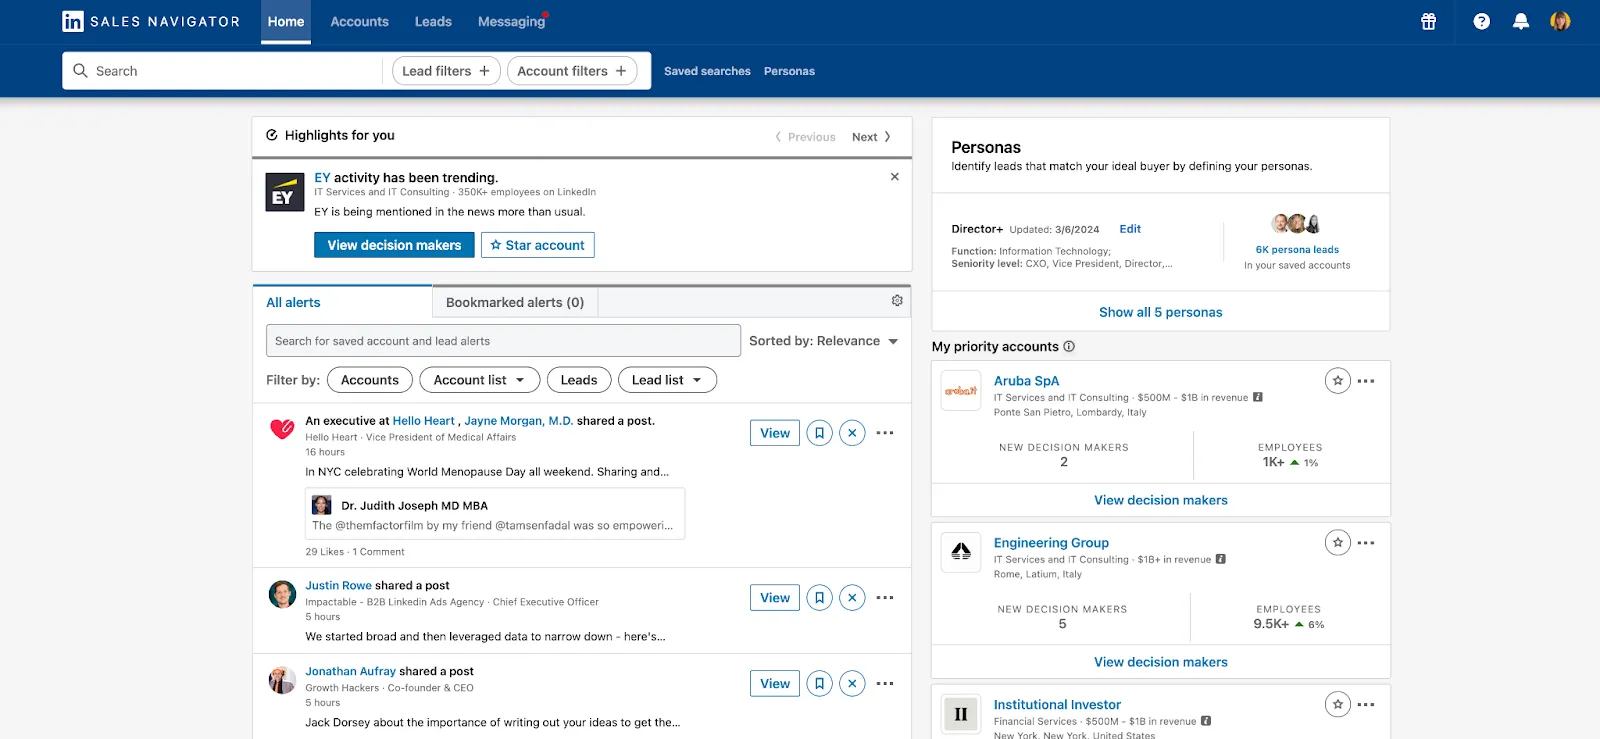
Sales Navigator offers two main search approaches:
- Account Filters: Build lists of target companies (best for account-based marketing)
- Lead Filters: Build lists of specific people within companies (best for direct outreach)
For beginners focused on connection requests and direct messages, start with Lead Filters.
This approach lets you reach decision-makers immediately rather than researching companies first.
If you are not ready to pay for premium yet, this guide to LinkedIn automation without Sales Navigator shows what you can still do.
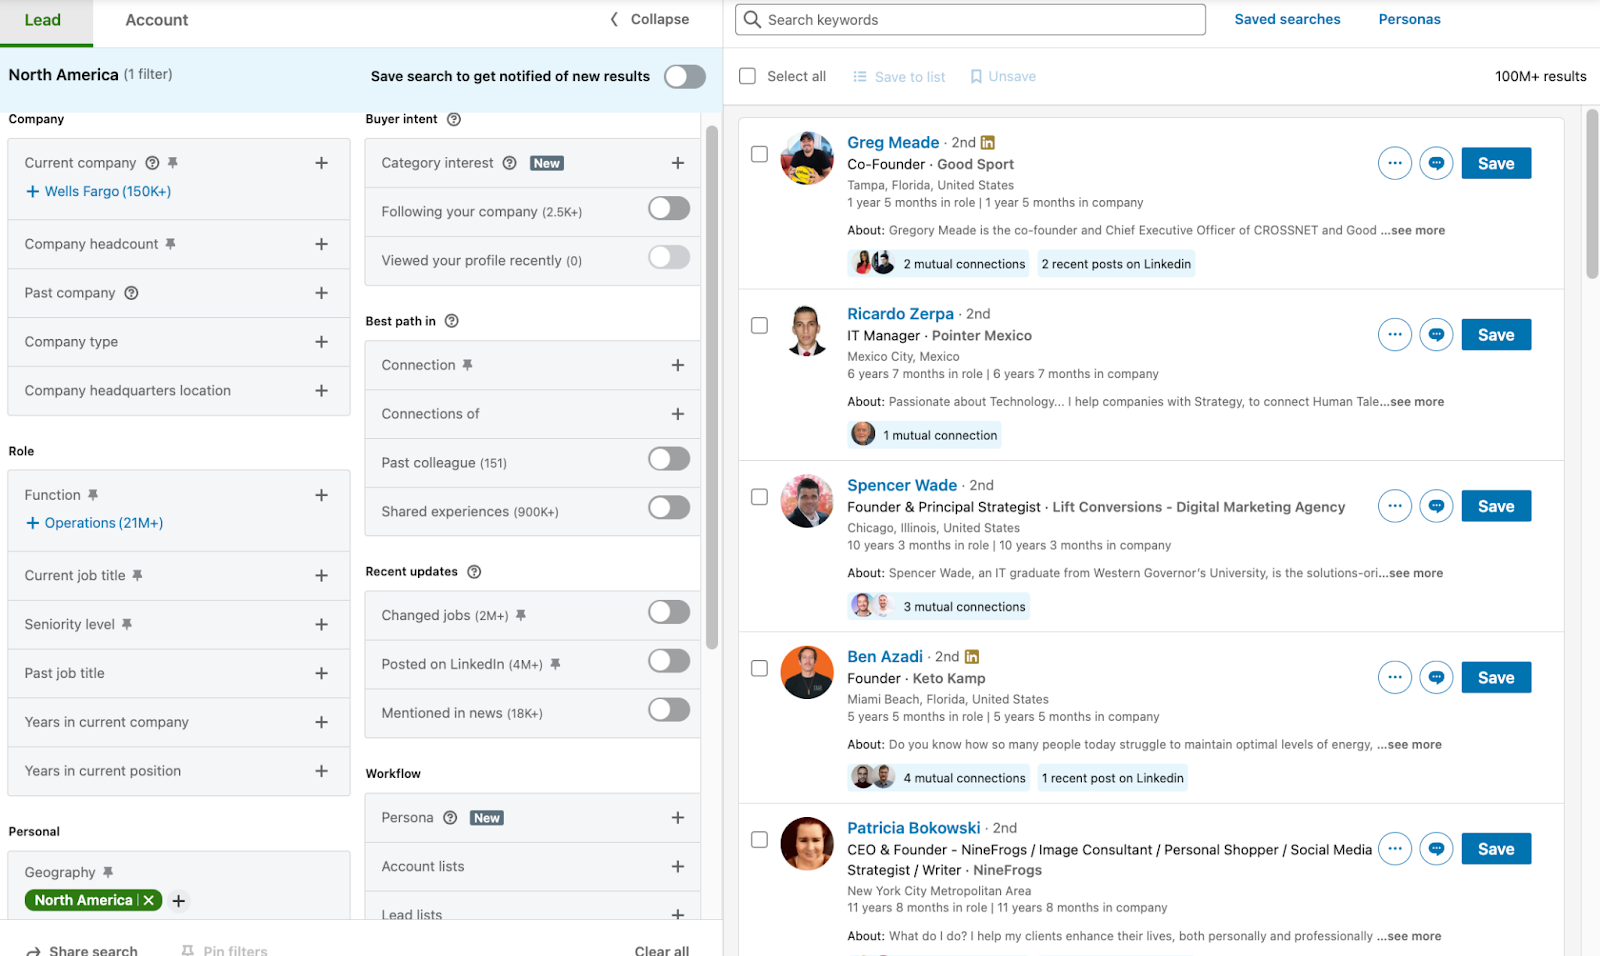
The 4 Essential Filters That Generate Results
Most Sales Navigator filters are optional. Focus on these four to build highly targeted prospect lists:
Filter 1: Company Headcount
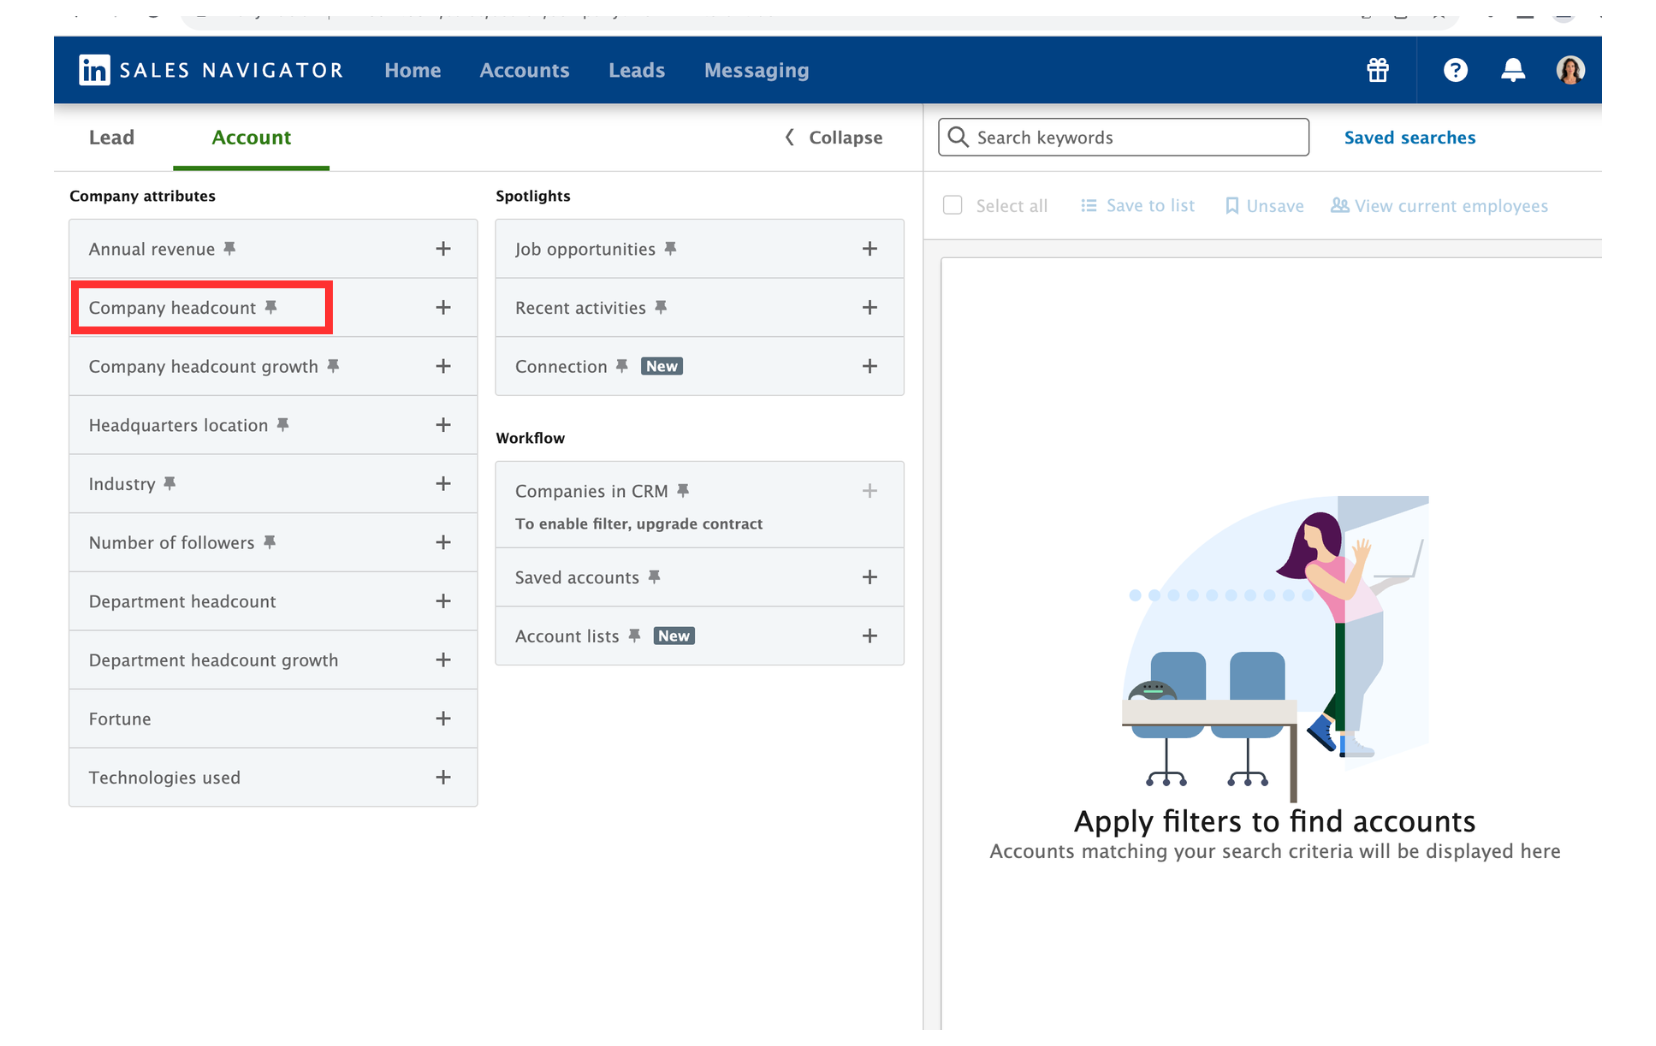
Why it matters: Company size determines budget availability, decision-making speed, and organizational complexity.
- Recommended range: 200 to 1,000 employees
Reasoning:
- Companies under 50 employees often lack budget for B2B services
- Companies with 200-1,000 employees have established processes and dedicated budgets
- Enterprises above 5,000 employees have longer sales cycles and complex procurement
Example: If you sell marketing automation software, targeting companies with 300-800 employees ensures They have marketing teams large enough to need your solution but aren't so large that decisions take 12 months.
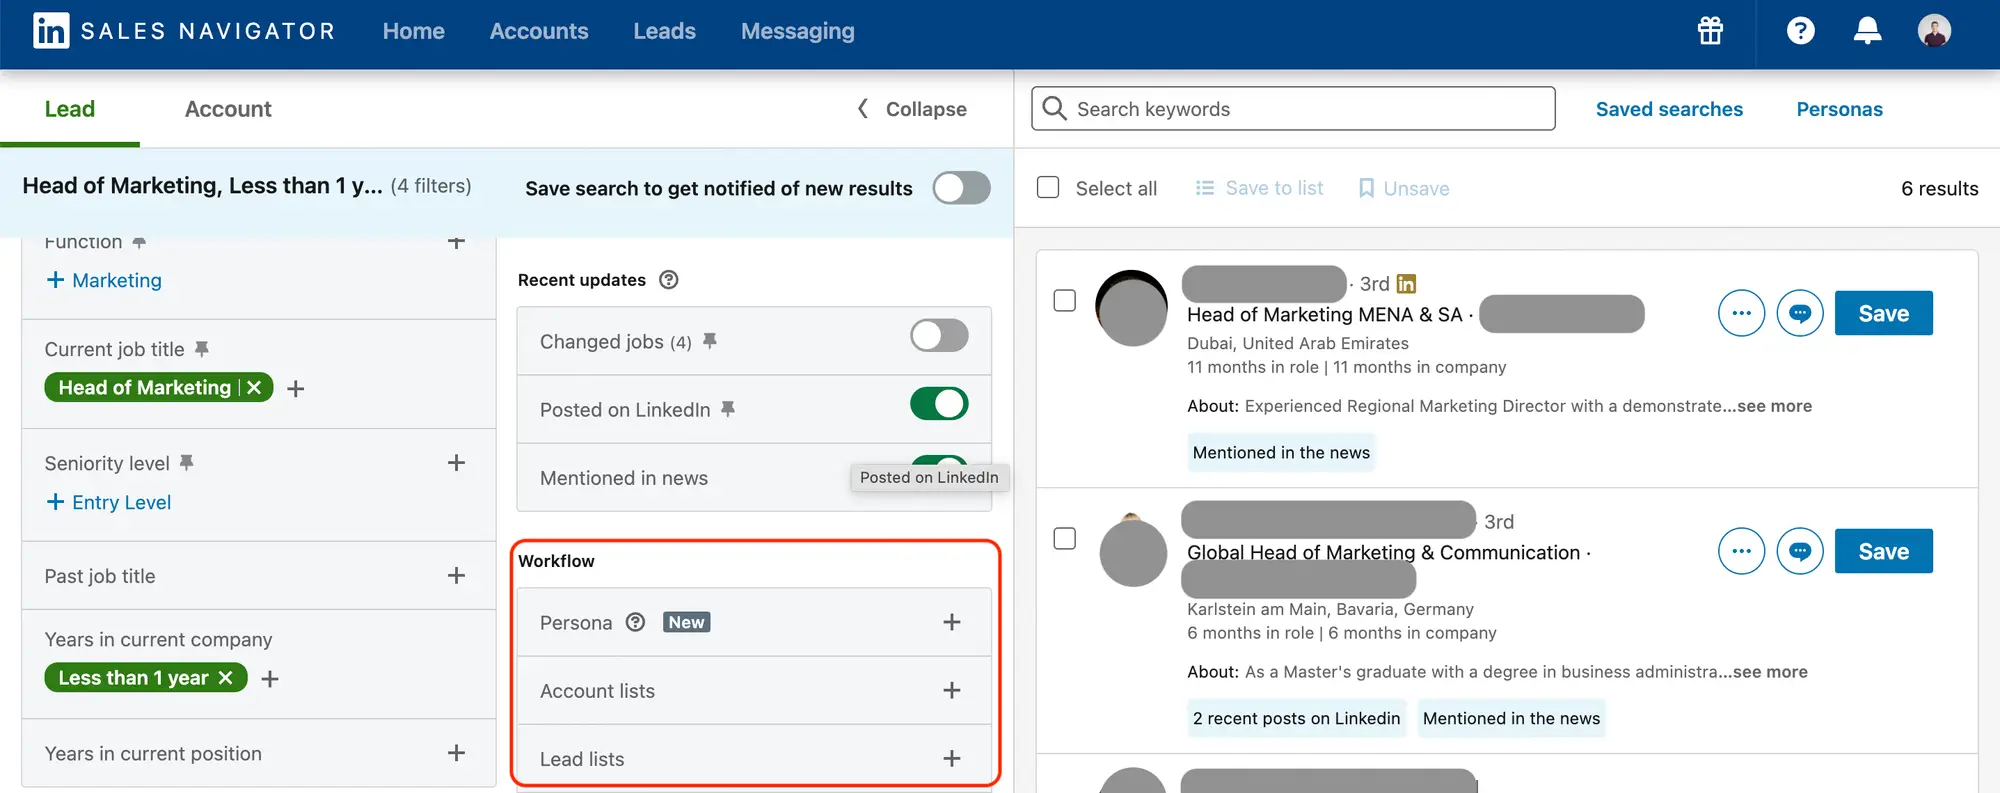
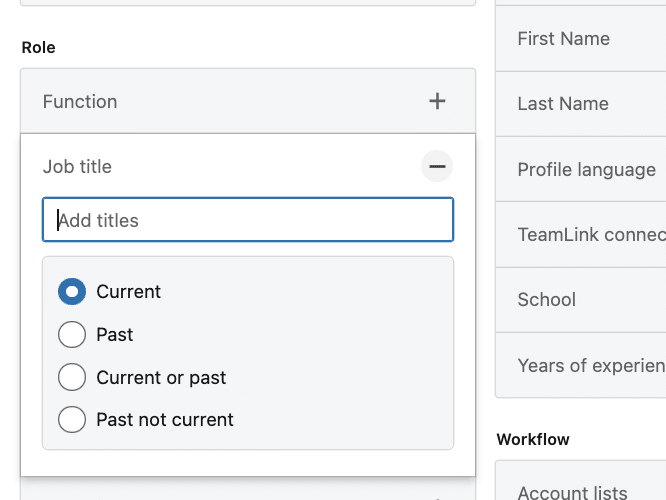
Filter 2: Job Title (Designation)
Why it matters: Generic outreach to "anyone in marketing" wastes time. Specific titles connect you with actual decision-makers.
Be precise with titles:
- "Head of Sales" (not just "Sales Manager")
- "VP of Marketing" (not just "Marketing Professional")
- "Founder" or "CEO" (for startups)
- "Director of Business Development"
Pro tip: You can add multiple job titles to expand your search.
For example, if you're targeting sales leaders, include "VP of Sales," "Head of Sales," "Sales Director," and "Chief Revenue Officer."
Filter 3: Geography
Why it matters: Target regions where you can realistically serve clients or where your time zones align for conversations.
Common configurations:
- North America: USA and Canada
- EMEA: Europe, Middle East, Africa
- Specific countries: If you specialize in certain markets
Consider time zones: If you're based in India targeting US clients, focus on industries that work with global teams or emphasize asynchronous communication.
Filter 4: Industry
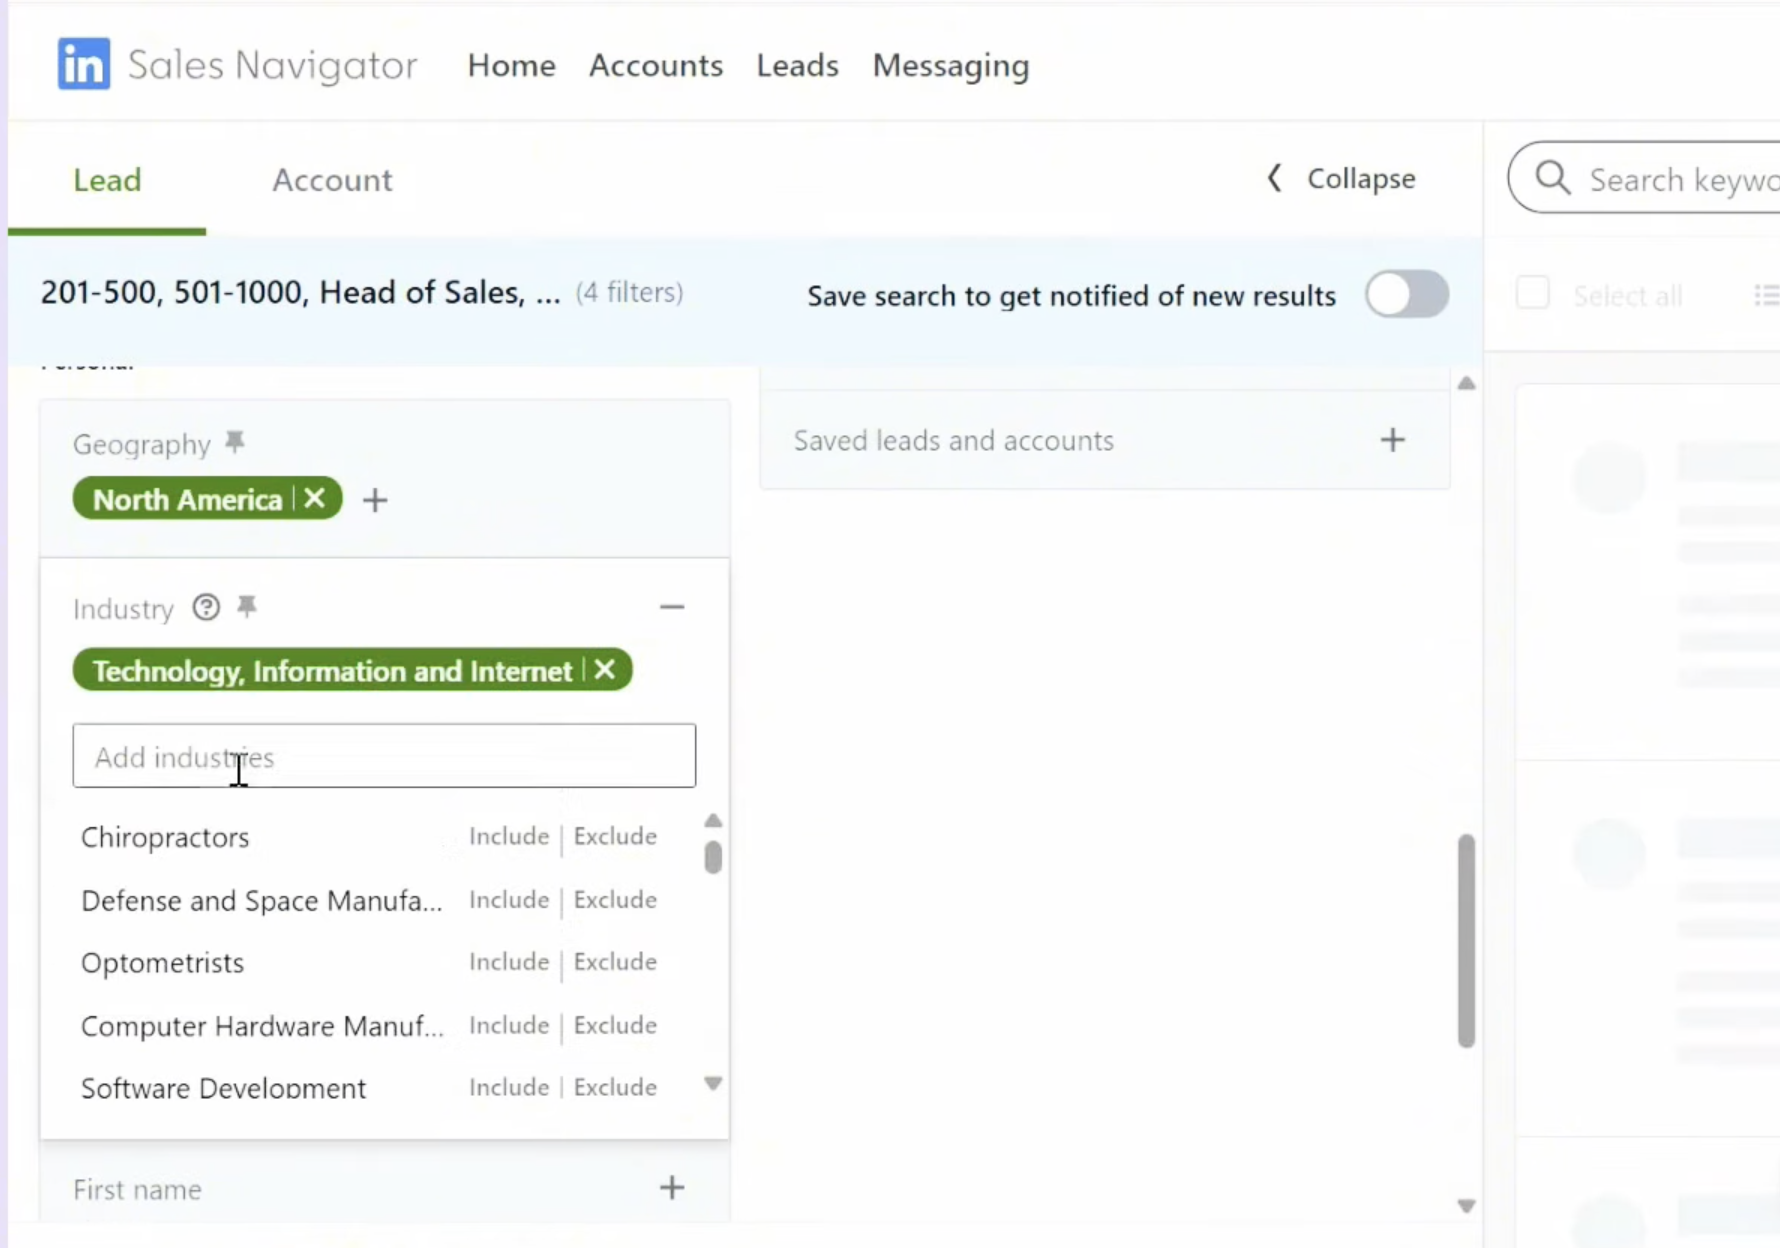
Why it matters: Your messaging should reflect industry-specific challenges. Targeting 2-3 industries lets you develop expertise and credibility.
Examples:
- Technology and Software
- Marketing and Advertising
- Financial Services
- Professional Services
- Healthcare
Strategy tip: Start narrow with one industry. Once you refine your messaging and see consistent response rates, expand to adjacent industries.
What Results to Expect
- Following this 4-filter framework typically generates 500 to 1,000+ qualified prospects per search.
- Quality matters more than quantity. A list of 300 perfect-fit prospects converts better than 3,000 loosely matched names.
The Critical Gap: Why Sales Navigator Alone Isn't Enough
1. Sales Navigator Finds Leads. It Doesn't Contact Them.
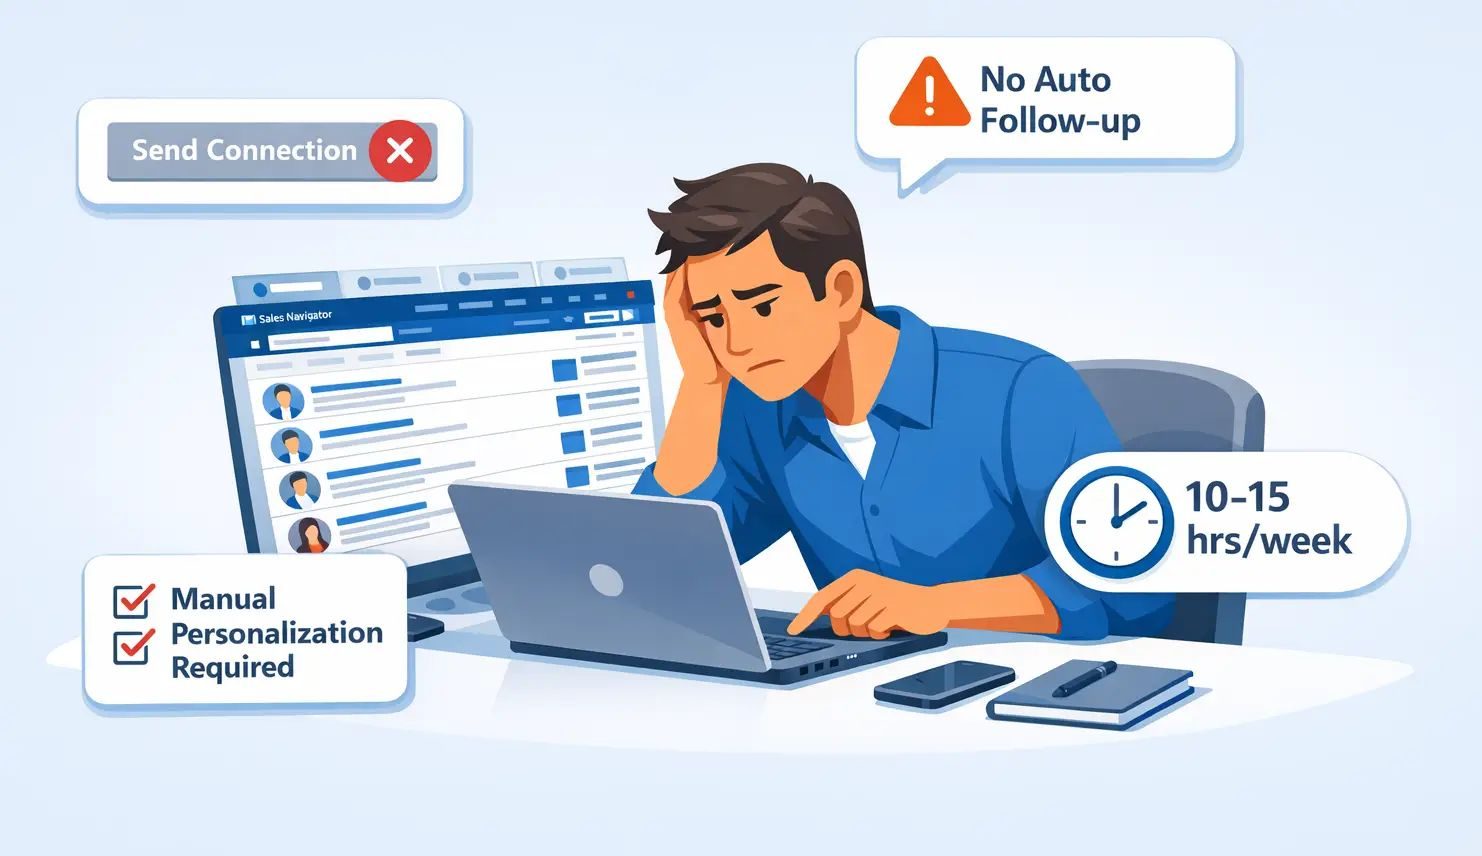
This is where most beginners hit a wall. Sales Navigator is a powerful search engine, but it does not:
- Send connection requests automatically
- Follow up with prospects who don't respond
- Personalize messages at scale
- Track conversations across multiple campaigns
You still need to manually click through hundreds of profiles to send requests. For a list of 900 prospects, this takes 10-15 hours per week.
The Automation Solution
This is where LinkedIn automation tools transform your workflow. Here's how the integration works:
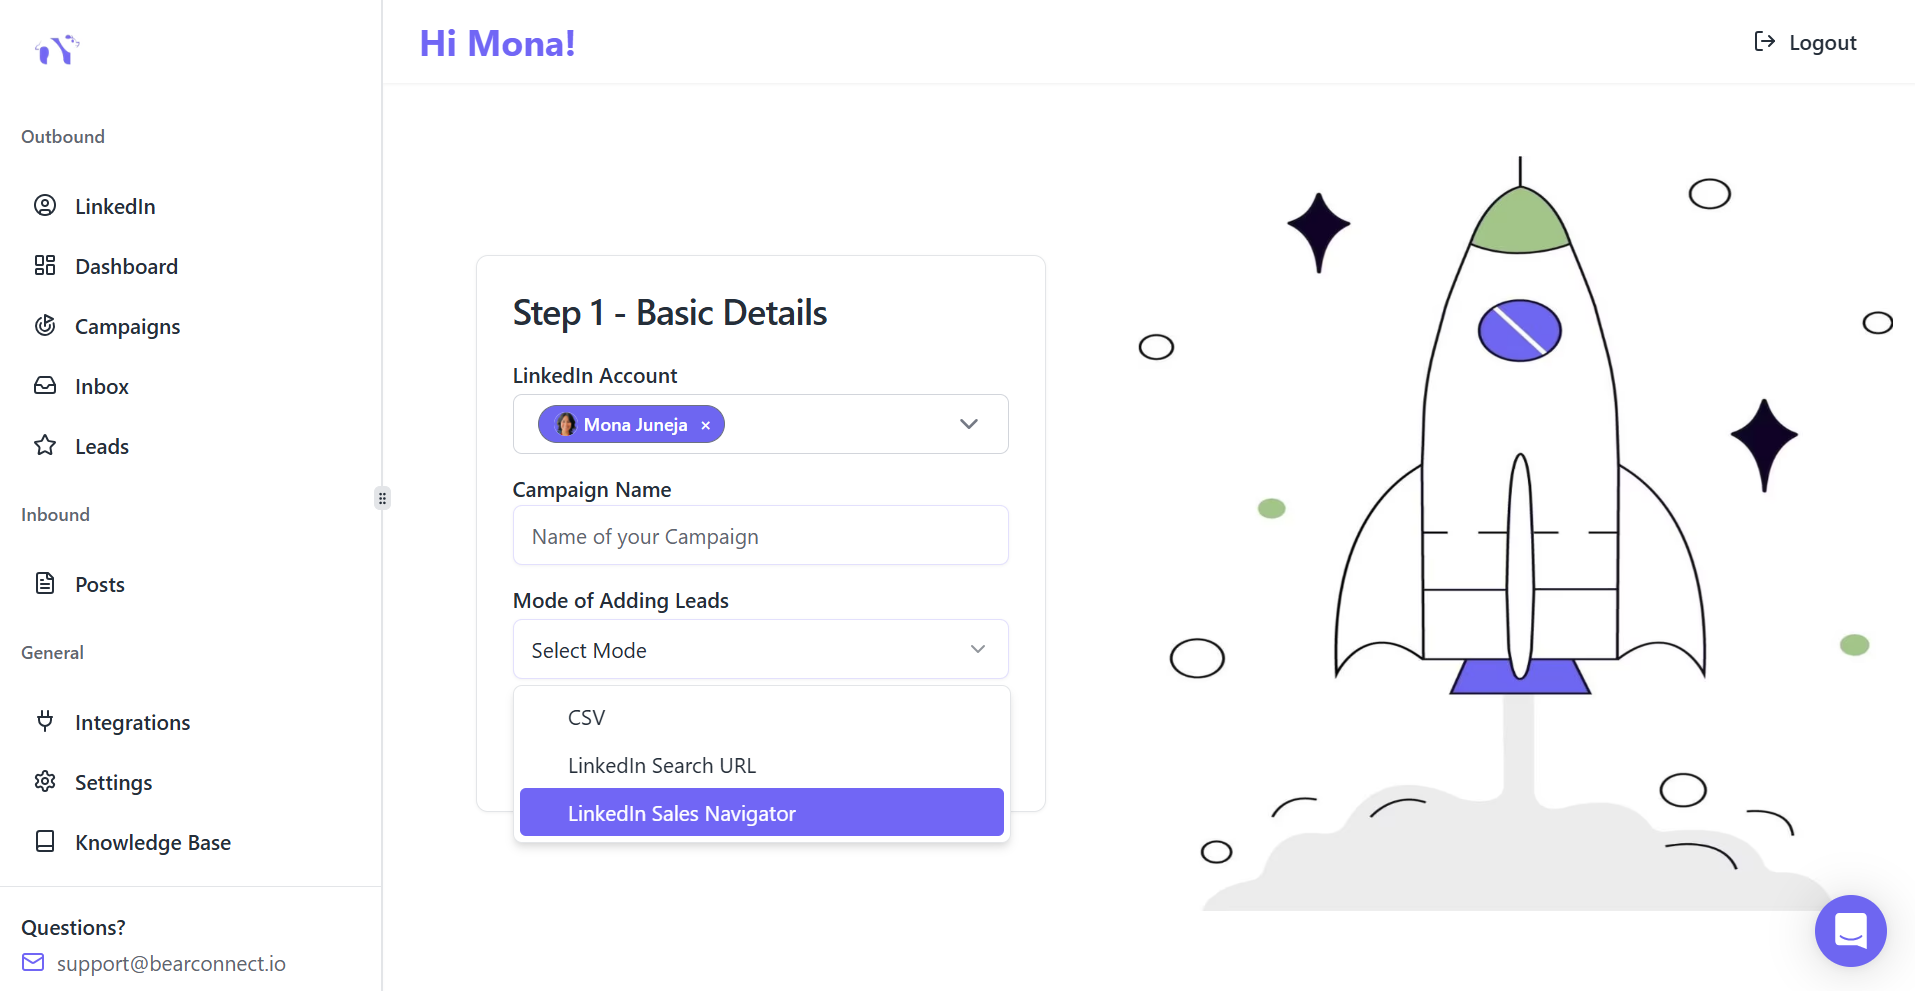
- Step 1: Build your targeted prospect list in Sales Navigator using the 4-filter framework
- Step 2: Copy the URL from your Sales Navigator search results
- Step 3: Paste that URL into an automation platform like Bearconnect
- Step 4: The automation tool extracts all prospects from your search and runs campaigns automatically
What Automation Delivers
- Time savings: Reclaim 10-15 hours weekly that would be spent on manual outreach
- Consistency: Automated follow-up sequences ensure no prospect falls through the cracks
- Scale: One person can manage outreach that would normally require a team
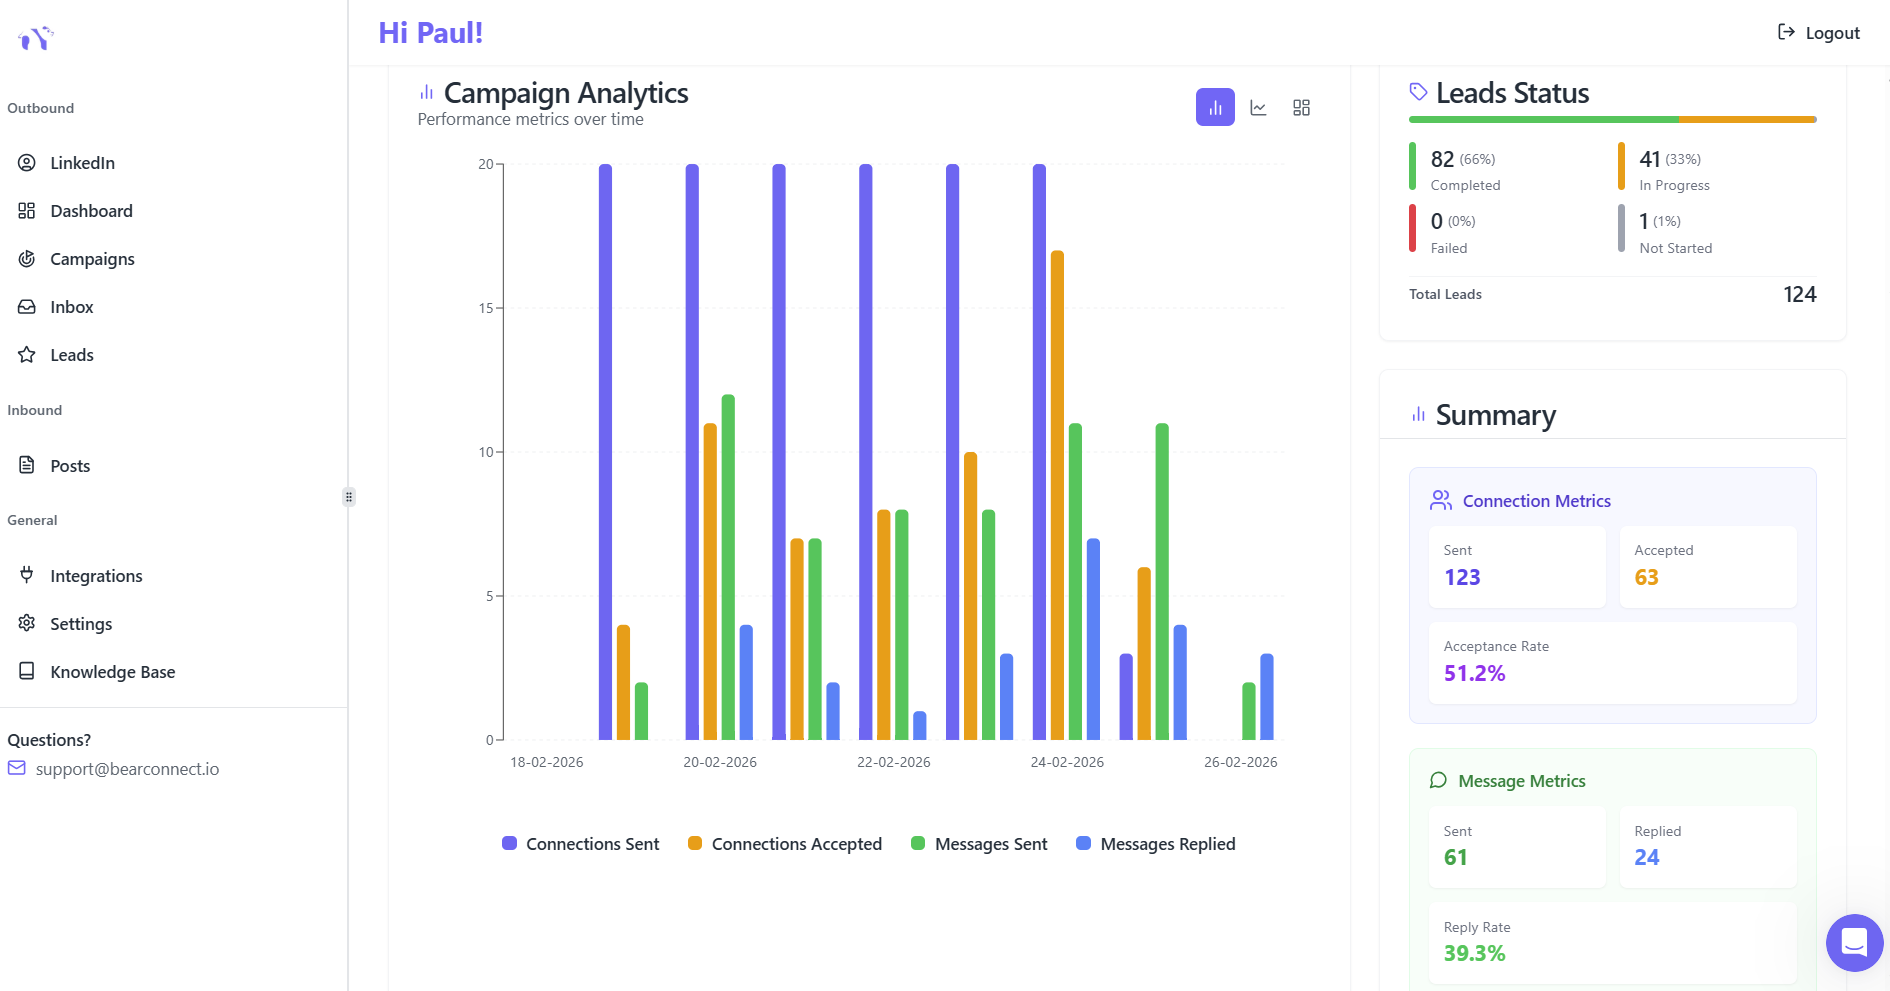
- Tracking: See exactly who opened messages, replied, and converted to calls
- Personalization at scale: Use dynamic fields to insert prospect names, company names, and custom variables
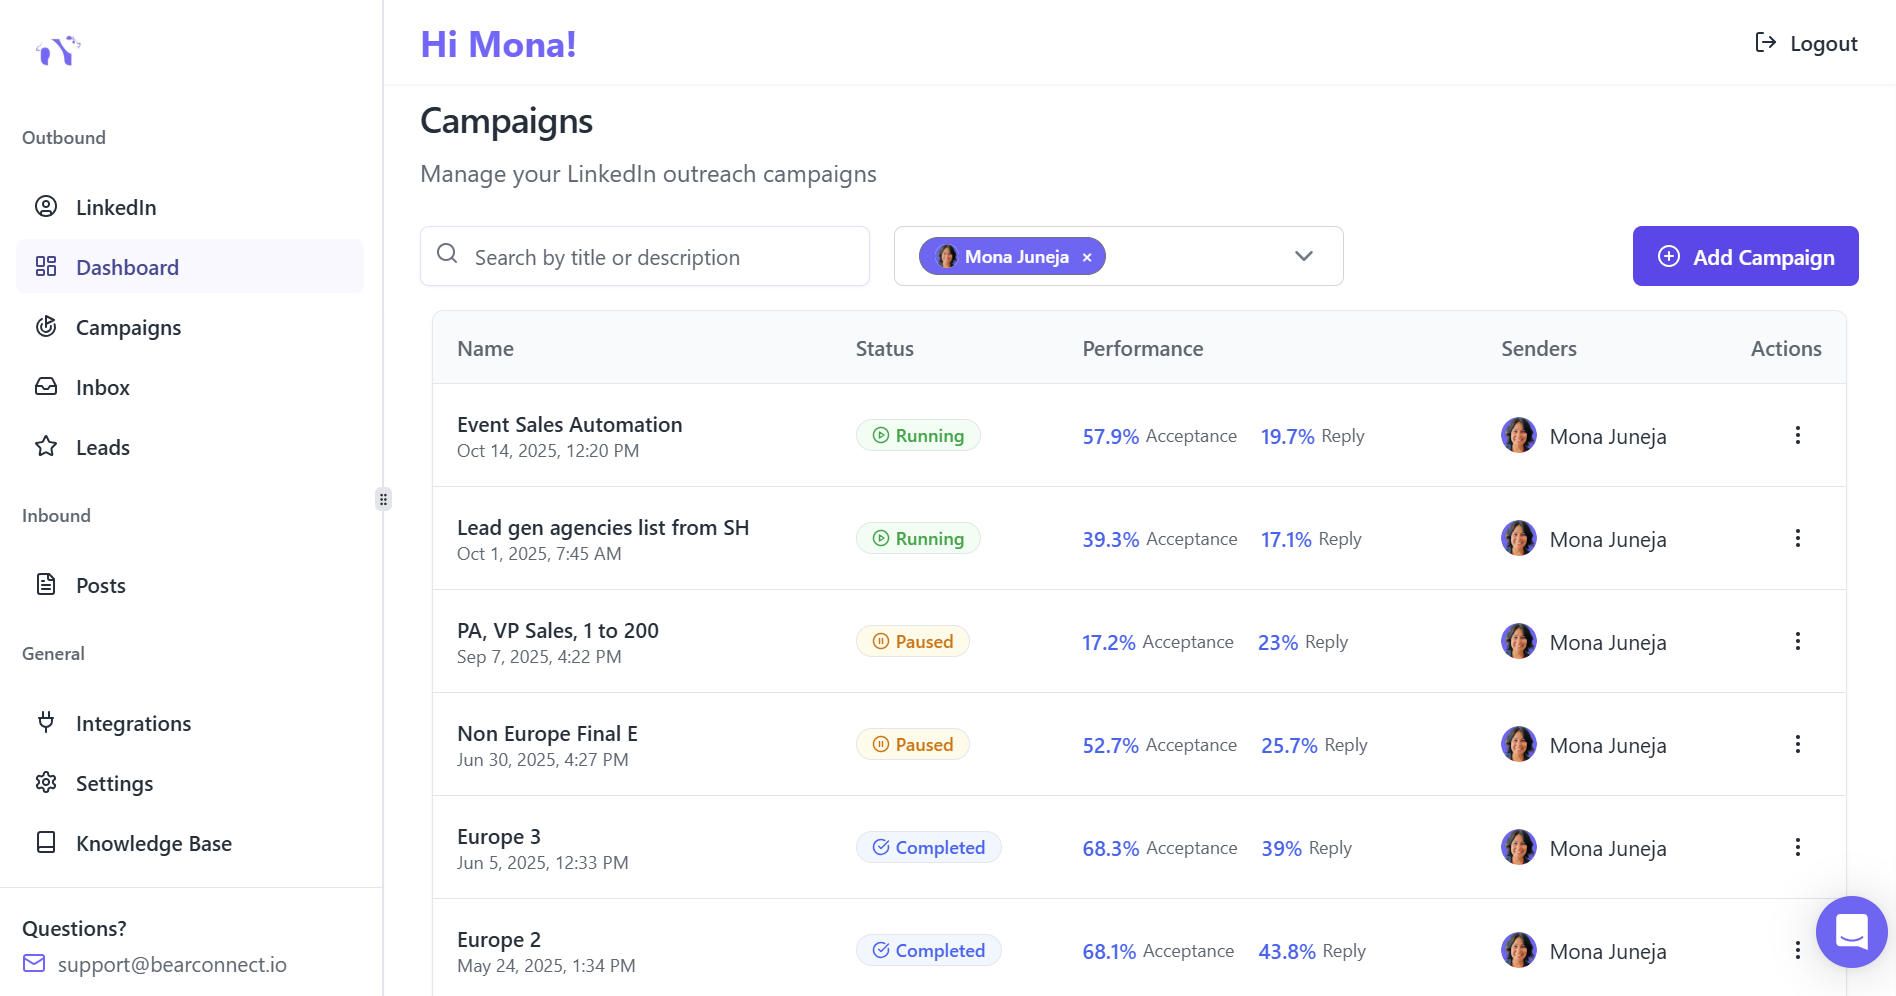
Bearconnect + Sales Navigator: The Complete Workflow
Bearconnect integrates directly with Sales Navigator to automate the entire outreach process.
Pricing: $67/month per LinkedIn account (or $57/month per account when connecting 5+ accounts)
Key features for Sales Navigator users:
- Unlimited campaign management
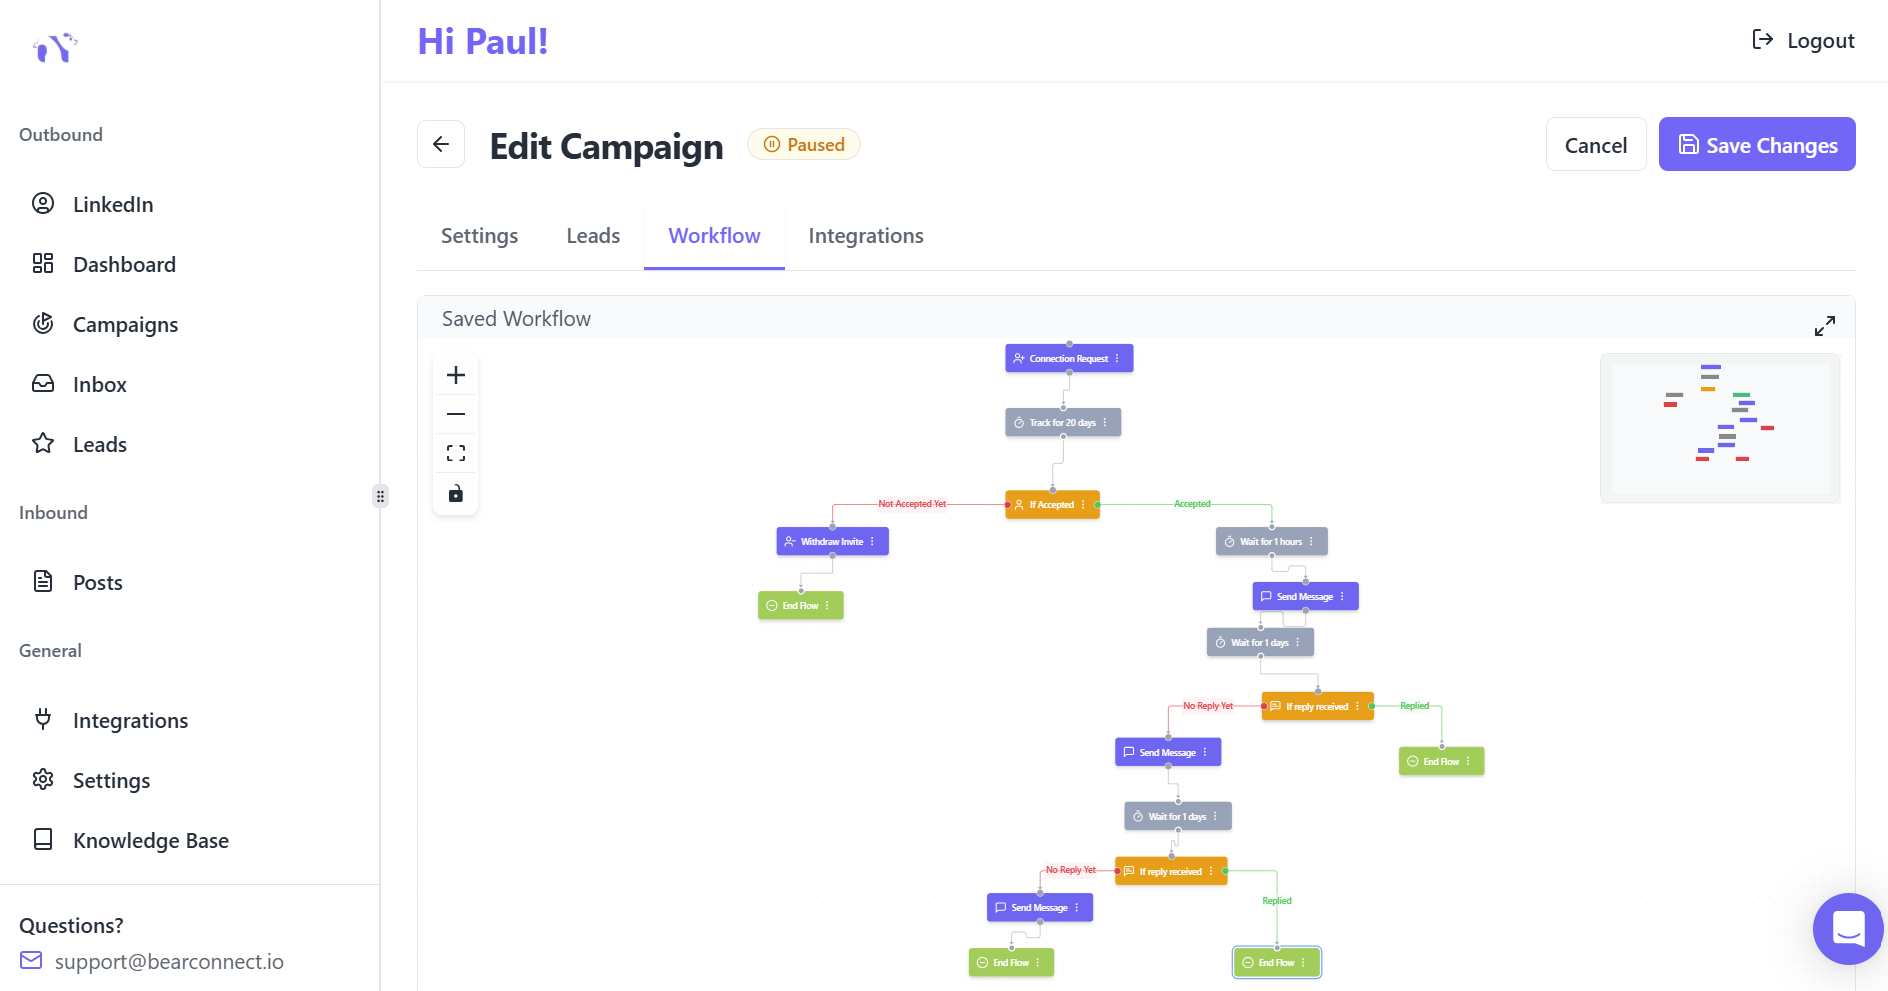
- Drip sequences with automated follow-ups
- Unified inbox for all LinkedIn accounts
- Advanced analytics showing connection acceptance and response rates
- AI-powered post scheduling to maintain visibility while you prospect
Safety features: Bearconnect uses local IPs and behavior mimicry to operate safely within LinkedIn's guidelines, reducing the risk of account restrictions.
Your Step-by-Step Action Plan
Week 1: Foundation
Day 1-2: Optimize your LinkedIn profile
- Rewrite your headline to focus on outcomes you deliver
- Update your banner and about section
- Add case studies or testimonials to your featured section
Day 3-4: Get Sales Navigator access
- Ask your network for a referral link
- Redeem your 2-month free trial
- Familiarize yourself with the interface
Week 2: Targeting
Day 1: Define your ideal customer profile
- Company size (200-1,000 employees recommended)
- Job titles (3-5 specific titles)
- Geography (start with 1-2 regions)
- Industry (1-2 industries initially)
Day 2-3: Build your first prospect list
- Apply your filters in Sales Navigator Lead Search
- Review the first 20-30 profiles to confirm quality
- Adjust filters if needed
- Save your search for future reference
Week 3: Automation Setup
Day 1-2: Set up automation
- Sign up for a 7-day free trial of Bearconnect
- Copy your Sales Navigator search URL
- Paste into Bearconnect to create your first campaign
Day 3-4: Craft your messaging
- Write a personalized connection request (under 300 characters)
- Create a 3-step follow-up sequence
- Use dynamic fields for names and company references
Day 5: Launch and monitor
- Start your campaign with conservative daily limits (20-30 requests per day)
- Monitor acceptance rates and replies
- Adjust messaging based on early feedback
Common Mistakes to Avoid
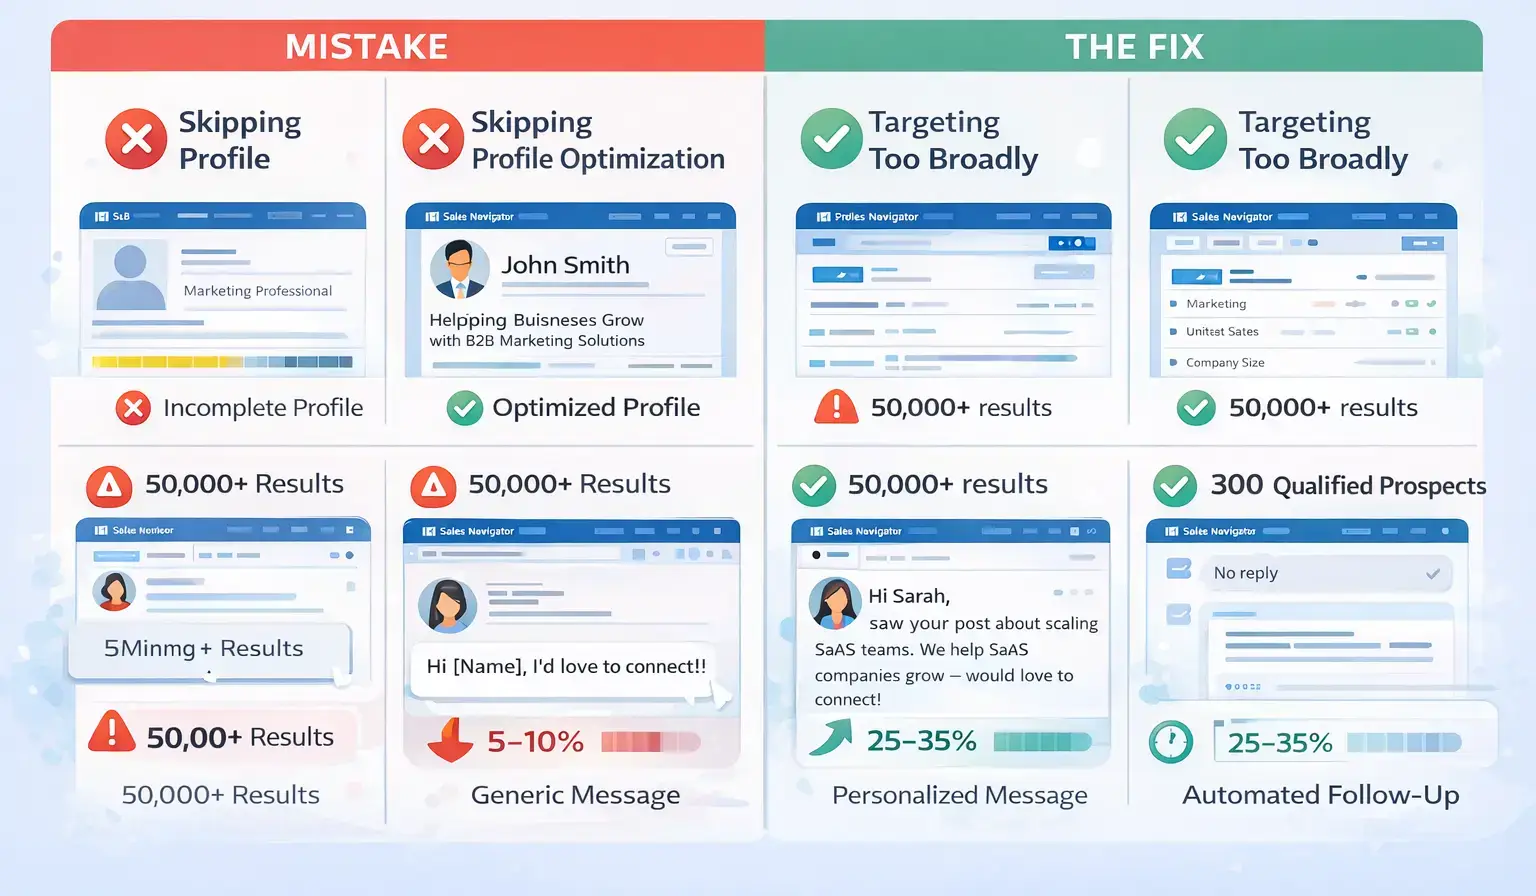
1. Skipping Profile Optimization
- The mistake: Jumping straight into Sales Navigator without fixing your profile.
- The consequence: Low connection acceptance rates and wasted effort.
The fix: Spend 3-4 hours optimizing your profile before sending a single request.
2. Targeting Too Broadly
- The mistake: Using vague filters like "Marketing" + "USA" that generate 50,000+ results.
- The consequence: Low-quality leads who aren't actually a fit for your offer.
The fix: Start narrow. A list of 300 perfect prospects beats 3,000 mediocre ones.
3. Sending Generic Messages
- The mistake: Using the same template for everyone: "Hi [Name], I'd love to connect!"
- The consequence: 5-10% acceptance rates instead of 25-35%.
The fix: Reference something specific (their company, industry challenge, or recent post) in your connection note.
4. Not Following Up
- The mistake: Sending one connection request or message and giving up.
- The consequence: Missing 60-70% of potential conversations that happen after the 2nd or 3rd touchpoint.
The fix: Use automation to send 3-5 follow-up messages spaced 3-7 days apart.
Measuring Success: What to Track
Key Metrics for Sales Navigator + Automation
- Connection acceptance rate: Aim for 25-35% of requests accepted
- Response rate to first message: Target 5-15% of connections replying
- Qualified conversation rate: Expect 2-5% of responses turning into discovery calls
- Cost per qualified lead: Calculate total tool costs divided by qualified conversations
- Time saved: Track hours reclaimed by automating manual tasks
Timeline for Results
- Week 1-2: Initial connection acceptances (50-100 new connections)
- Week 3-4: First qualified conversations and discovery calls
- Week 6-8: First deals closed from LinkedIn outreach
- Month 3+: Consistent pipeline with 10-20 qualified conversations monthly
The Complete 3-Step Framework (Recap)
Step 1: Optimize Your LinkedIn Profile
Your profile is your sales page. Fix this before spending money on tools.
Step 2: Use Sales Navigator to Build Targeted Lists
Apply the 4-filter framework (company size, job title, geography, industry) to find 500-1,000 ideal prospects.
Step 3: Automate Outreach for Consistency and Scale
Use tools like Bearconnect to send connection requests, follow-up messages, and track conversations automatically.
This workflow has helped B2B teams generate 5-10x more qualified connections and turn LinkedIn into a predictable lead generation engine.
Ready to Start? Here's Your Next Step
Sales Navigator is powerful, but only when combined with a strong profile and systematic outreach. The three-step framework (Optimize, Target, Automate) removes guesswork and replaces it with a repeatable system.
Try the complete workflow:
- Optimize your profile this weekend
- Get your 2-month free Sales Navigator trial through a referral
- Sign up for Bearconnect's 7-day free trial to automate your first campaign
Want to see how automation works with Sales Navigator? Watch the complete tutorial here: LinkedIn Sales Navigator for Beginners | Step-by-Step Guide
5 Frequently Asked Questions
1. Do I really need Sales Navigator to use LinkedIn automation?
No, Sales Navigator is optional. Basic LinkedIn accounts work with automation tools like Bearconnect. However, Sales Navigator provides advanced filters (like company headcount and seniority level) that make finding ideal prospects 5-10x faster. Start with free LinkedIn, then upgrade to Sales Navigator when you need more precise targeting.
2. Is LinkedIn automation safe, or will it get my account banned?
When done correctly with tools that mimic human behavior (natural delays, local IPs, daily limits), automation is safe. Choose platforms like Bearconnect that operate independently of LinkedIn Sales Navigator, use smart throttling, and respect LinkedIn's action limits. Avoid aggressive settings like 100+ connection requests daily, which trigger red flags.
3. How long does it take to see results from Sales Navigator and automation?
Most users see initial connection acceptances within 5-7 days. Qualified conversations typically start in weeks 2-3 as follow-up sequences engage prospects. Full pipeline impact (booked calls and closed deals) usually appears within 4-8 weeks of consistent, optimized outreach with proper messaging and targeting.
4. What's the difference between Lead Filters and Account Filters in Sales Navigator?
Account Filters help you build lists of target companies (ideal for account-based marketing or company research). Lead Filters help you find specific people within companies (better for direct connection requests and outreach). Beginners should start with Lead Filters because they enable immediate contact with decision-makers rather than requiring additional research steps.
Ready to Transform Your LinkedIn Strategy?
Join thousands of professionals already using Bearconnect to automate their outreach and grow their network.
7-day free trial • Cancel anytime
